And yes, here is the requested MoM ID card, which is now customizable :D
(A link to the movie-prop version with Mafalda Hopkirk can be found here)
If you're wondering how to get your "Sun in Pisces"/"Moon in Leo" signs, I've found this link to astro.cafeastrology.com to be useful.
There are two fonts that you need to use this Photoshop file properly:
Mom's Typewriter Font
Rough Typewriter Font
Download both of those files and install them. If you need instructions on how to do that, you can find some here.
Here is a link to the Dropbox Photoshop file download:
Customizable MoM ID Card Photoshop (72.4MB)
Yes, it's rather large, but it needs to be for it to be good quality and completely customizable. This version was made in Photoshop Elements 7. You should be able to open it with later versions of Photoshop and possibly even with GIMP (although I have not tested this).
It is a fully customizable version. You can even put your own photo in and have the Ministry of Magic seal superimposed on top ;)
What I recommend you do is insert your photo and resize it/crop it as needed, and then apply a grain filter to it to give it a nice touch. I would also recommend changing it to black and white.
For the fingerprints, since I realize most people don't have purple ink pads (I don't), all you need is a nice dark purple marker. Colour on your fingers and press it down onto the page.
I assume that you have enough experience with Photoshop to know how to save images as .png or .jpeg or .tif files, if not, you'll have to look up a tutorial. You may even want to crop the picture into different sections for saving. Once you've done that, using whatever method you prefer, print it off and cut it out, then glue and staple it together for your own customized Ministry of Magic ID Card ;)
I'll try to get a smaller customizable version out soon so it's not so much of a hassle to download. For now, though, I just wanted to get this out there for those who wanted it.
Here is a link to a plain picture file so that if you want you can print it out and write your name etc. on there and cut and paste a picture in (if you don't have Photoshop or are unfamiliar with the use of the program)
Customizable MoM ID Card Flat (34.23MB)
Yes, this file is still rather large. I didn't want to reduce the quality very much since I want you to get the whole thing so you can have the best-quality prop possible. But as soon as I can I will divide the file up into more manageable parts. Right now, however, this is how you get it ;)
I really hope this helps people out, I know that there are a lot of things out there that offer to do this kind of thing for $10.00 on Etsy if you want but I wanted to provide a cost-effective version for those who wanted a bit more of a DIY experience. So I hope that this works out for you ;)
>>Link to Table of Contents
Here on this blog you will find many innovative and budget-friendly ways to spice up your Harry Potter Party! These ideas are also useful if you’d like to make yourself some Potter souvenirs, Potter food, and even a Hogwarts Acceptance Letter (complete with a Platform 9 ¾ ticket!) for yourself or a friend. See the Introduction for more details and a lovely Table of Contents to help you navigate the blog.
October 08, 2012
September 30, 2012
Ministry of Magic Identification Booklet (Printable)
 |
| The Ministry of Magic Identification Booklet (Inside Pages) |
Back again, this time with more printables from the movie! I present to you ... the Ministry of Magic Identification Booklet!
 |
| A JPEG-compressed picture of the identification card. Due to size limitations, I have reduced the quality so that I can display it on this blog :) |
I have two versions right now and a third one coming out soon-ish (Probably mid-October unless someone specifically requests that it come out sooner). The first version is the Ministry of Magic Identification card the same size as the prop with all of Mafalda Hopkirk's information on it.
The second version is made a bit smaller so that it is more earth-friendly and fits on two pieces of paper. (The regular-sized version is four pages)
The third version is the most exciting :D It will take me a little while to whip up, since I have to do a lot of photoshopping. However, it will come out soon! The third version is a DIY Ministry of Magic Identification Booklet. That means you will be able to customize it with your name and photo, and also your own fingerprints and signature. Hopefully I'll even be able to come up with a "master Photoshop file" that will allow you to superimpose the stamp of approval over your photo :) I'm very excited to give you Potterheads this!
As per usual, the links to the files can be found here, and they go to a MediaFire page.
Regular-Sized Ministry of Magic Identification Booklet (4-page PDF)
Small-Sized Ministry of Magic Identification Booklet (2-page PDF)
**Update! October 8/12**
I was feeling ambitious (AND someone requested it be done earlier ;) so I did finish the customizable booklet early! It took a lot of photoshopping but I hope that you like it :D So you can see what I mean, here's a compressed MoM ID card of Hermione Granger, which I customized using my lovely Photoshop file:
| Again, reduced-quality version. Here's my customized Hermione Granger MoM ID card/booklet! |
I will put together a picture tutorial on how to put it together very soon. For now, I hope that these instructions will suffice:
July 25, 2012
Marauder's Map: Inside and Outside
**UPDATE**
This has been long overdue, with all of the people asking and everything, but I do feel like I need to make it known that I DO NOT HAVE the extra parts to the Marauder's Map. I would absolutely love to have them, however, and I'd be more than happy to edit them into the template and tutorial etc. So if anyone knows where I can find a good-quality, flat version of the extra bits, please comment the link. Until then, the best I can give you is this great tutorial from Jennifer Gibson. She altered the map so that there was a middle flap, and if you would like to see how she did it just follow that link.
Before I begin with this tutorial, I'd like to say:
It recently came to my attention that there are people pinning things from my website on Pinterest. I was quite pleasantly surprised and shocked to see it. So here's a big THANK YOU too all of the lovely people who have enjoyed the work I've put into the blog and have shared it with others :)
Anyway, continuing with this tutorial ...
I recently got my hands on a complete Marauder's Map and scanned all of it into my computer, then put it together in one large file for printing and party purposes!
Yes, that means that you can now have the inside of the Marauder's Map as well as the outside. ;)
I will post the picture here in a condensed form, but I recommend you download it from MediaFire.com, simply because the file is rather large and to get the best quality possibly you ought to download the original file.
I've also made a PDF file that will make it easier to print your own Marauder's Map. It is three pages long and in landscape mode. You can download the white map in PDF format on MediaFire.com.
 |
| A condensed version of the map to show you what it looks like |
 |
| The red lines represent fold lines. In case you are confused on where to fold, you can check this. |
I've also cleared out the background colour (the brown) and changed it to white so that if you wish to give your printer and ink a break you can print it with the white and stain the paper to achieve the same effect. The white version is found here. The tutorial to stain your paper can be found by clicking this link.
Additionally, if you would like to see the other Marauder's Map tutorial, just click on that link. Where that Marauder's Map comes in handy for party activities, this one is more for decoration.
Directions on How to Make the Map
I've gotten a few comments asking for how to do it, so I made one and took lots of pictures so you can see how it's done. ;)
March 29, 2012
Philosopher's Stone Tutorial
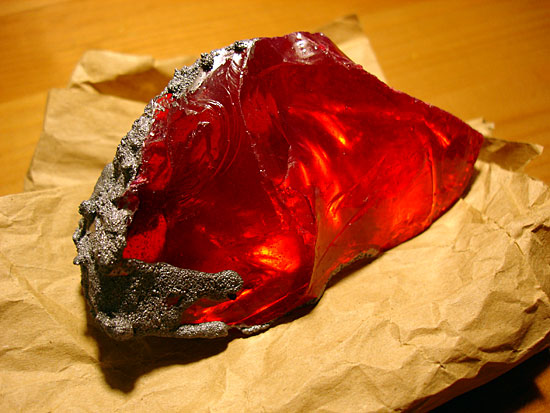 |
| A version of the Philosopher's Stone I found on CuriousGood.com that was made out of resin. |
 |
| My, very simple, version of the Philosopher's Stone. I used Method 1. |
For use in activities for the first book (or just for decoration), we made a Philosopher's stone. It was very simple, and there's a variety of ways to make it depending on your resources.
The first way:
Things You Need:
Red glass stones (available at most craft stores and even dollar stores)
Hot glue
Directions:
It's very simple; just glue the stones together into a large, bumpy rock.
The second way:
Things you need:
Average stones, preferably all the same colour
Red paint
Hot glue
Directions:
Again, not hard, all you need to do is paint the stones, and when they're dry glue them all together into one large stone. I also recommend painting red over the entire thing again when you're done.
Third way:
Things you need:
A large stone
Red paint
Directions:
Wash the stone and paint it red. If you like, you can 'distress' it a little by making a very thin black paint mixture (thin it by watering it down) and brushing it over the surface of the stone, allowing it to pool in some areas.
Fourth way:
Things you need:
Clay (can be the kind you bake or not. Clay is usually found in craft stores or at a dollar store)
Red paint
Black paint (optional)
Directions:
Mould out the clay so it resembles the Philosopher's Stone. Bake or let it dry according to the manufacturer's directions. Paint a layer or two of red paint on it. When that's dry, you can 'distress it' a little by watering down the black paint and lightly brushing it over the clay, allowing it to pool and collect in some areas.
>>Link to Table of Contents
February 22, 2012
How to make a Marauder's Map (Party Version)

 |
| The printable outside of the Marauder's Map |
These maps were made to be used in activities and thus contained an actual map of the location of the party.
What your need:
A printer (preferably colour and laser jet; cannot be an ink printer)
Knowledge of the locations of rooms in your home or location of your party, including closets etc. A blueprint of your house/location of party could be useful here, too
FOR STAINING:
Tea
15x10x1 pan (aka jelly-roll pan/cookie sheet)
See the staining your paper tutorial I have provided for more detailed instructions
First, I have provided the outside of your map for you below above, just under the first picture. If you fold the ends in to the center, you will get a map that looks similar to the picture at the top, however, it will be white for now.
But you don't need to print it just yet. First, you'll need to create a map of your house/the location of the party. The map should be in landscape format. There are several ways to do this depending on your resources and computer skills:
- Use Photoshop or a similar program (GIMP is a free alternative to Photoshop and will even open Photoshop files for editing. It doesn't have all the options of Photoshop and it's not as user-friendly, but if you don't want to spend the money it's a good option) create a simple map of the rooms in your house/location of party. This is usually achieved through simple squares and lines
- Use the "Paint" program that comes with most Windows computers (I'm not a Mac user and can't say for sure if there's a similar program for that) and create a simple map of the rooms in your house/location of party
- Draw a map of your house/location of party on a piece of paper and scan it into your computer
- Draw a map of your house/location of party, take a picture of it in good lighting, and load it onto your computer
- Draw a map of your house/location of party on each Marauder's Map after printing and staining it
Any of those options would work. I chose #1 because I have Photoshop and am rather good with computers.
You may want to make some changes in how you create the map of your house, i.e. the main alterations we made were:
You may want to make some changes in how you create the map of your house, i.e. the main alterations we made were:
- We labelled everything 'magical'-sounding names (e.g. closets were 'broom cupboards'. A list of possible names will be provided below)
- We left out a bathroom on the main floor to be the 'Room of Requirement', because the Room does not show up on the Marauder's Map, so naturally it would not show up on ours
If you would like to give the rooms in your home more 'magical'-sounding names, a list of possible alternatives is below: (some things are repeated i.e. a bedroom could be the 'Divination Classroom', or your attic could be the Divination classroom)
A tree, especially a Willow tree – Whomping Willow
Any outdoor water source – Black Lake
Attic – Divination Classroom
Basement – Dungeons, Underground, Snape’s Storage Rooms, Potions Classroom
Bathroom – Moaning Myrtle’s Lavatory, Entrance to the Ministry of Magic, the Loo
Bedrooms – Astronomy Tower, Arithmancy Classroom, any sort of classroom name including Transfiguration, Charms, Muggle Studies, Divination, etc.
Closet – Broom Cupboard
Dining Room – Great Hall
Forest – Forbidden Forest
Furnace Room – Floo Network
Garden – Hagrid’s Pumpkin Patch
Greenhouse – Herbology Classroom
Hallways – Entrance Hall, 7th Floor Corridor, 3rd Floor Corridor
Kitchen – Hogwarts Kitchens
Living Room – Common Rooms, Dormitories (could call it the ‘Hufflepuff Dormitories’, or substitute the word ‘Hufflepuff’ for Gryffindor, Slytherin, or Ravenclaw)
Master Bedroom – Dumbledore’s Office/Headmaster’s Office
Offices – Defense Against the Dark Arts Professor’s Office, Unused Classroom
Shed – Shrieking Shack, Broom Shed
Stairs – Grand Staircase, 3rd Floor Corridor
If you have any other suggestions, feel free to comment and I'll add them!
When you have finished creating and labelling your map, print them out so that the picture at the top is on one side of the paper and your map is on the other. You can fold it in now, but it's easier to just wait.
Now you're going to stain the paper, and the instructions can be found in my other post, The Letters/Invitations--How to Stain Your Paper Tutorial. Stain all of your maps, flatten them, and then fold the edges in and you will have a lovely map that looks similar to this:

This map went over really well, and many of my friends now display it in their bedrooms! It's such a simple craft but really looks fantastic when it's finished.
February 11, 2012
How to Make Magical Wands (Without woodworking skills)
This is a tutorial on how to make easy magical wands for your guests. They're relatively simple and don't take long; the longest part is waiting for them to dry. They are made primarily of paper and glue but end up quite sturdy at the end.
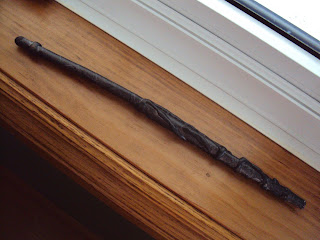
And your wands are ready for spell casting!
>>Link to Table of Contents

The picture above was taken after the wands had been used during the party, so it's not in quite as good a shape, but nonetheless looks nice :)
I found this tutorial on instructables.com and found it very useful. They also have some good pictures so that you understand what we mean with these steps.
Things You Need:
A piece of paper, 8.5”x11” or larger
Double-sided tape (optional)
Hot Glue gun
White glue (optional but recommended; can use hot glue as well)
Scissors
Paint, spray paint or otherwise, in the colour you would like your wand to be
Toilet paper, tissue paper, or even scrap paper
Directions:
- Stick a strip of double-sided tape diagonally across your paper. You can skip this step (we did), but it helps to keep the paper wound tightly. Another idea is to put a straw diagonally across the paper or a barbeque skewer or something similar to make the wand stiffer, however, we found that they ended up quite stiff without any of that.
- Tightly roll the paper, beginning in the corner and working to the opposite corner. Roll it slightly diagonally so that one end of your wand is slightly larger than the other.
- Once you’ve rolled about halfway, take some glue, preferably white, and smear it on the unrolled section of paper. We used a plastic paintbrush and painted some on. Make sure you get it right to the edges of the paper for the best stick.
- Continue to roll the wand up until you reach the end of the paper. Hold the wand together tightly so that it dries. You may have to hold it for a few minutes.
- When you’re sure that the ends will stay on, let it dry for a bit longer so that the paper isn’t soggy.
- Now snip the ends off so that they’re flat and dribble some glue into one of the ends (we did the larger one first). You can use white or hot glue, but we used white so we wouldn’t use up all the hot glue. However, the hot glue dries much faster and probably a bit stiffer.
- After sticking some glue into the end, take a square of toilet paper (or a small bit of scrap paper, tissue paper etc.) and roll it up, then stuff it into the hole. Dribble a bit more glue on top of the paper and repeat. If you need to, don’t hesitate to use a pencil or barbeque skewer etc. to shove the toilet paper down more.
- Once all that is dry, use some hot glue to create a round end at the bottom of the wand.
- We found that a very useful way to let the wands dry was by using the toilet paper roll and putting the ends of the wands in it so that it dried standing up.
- Now after filling the other end of your wand and letting it completely dry (you may have to wait overnight), create some details on the wand with the hot glue. You might want to make a vine pattern, or you can layer it to make a handle.
- Paint your wand in the colour of your choice. We used a dark bronze spray paint.
And your wands are ready for spell casting!
>>Link to Table of Contents
February 06, 2012
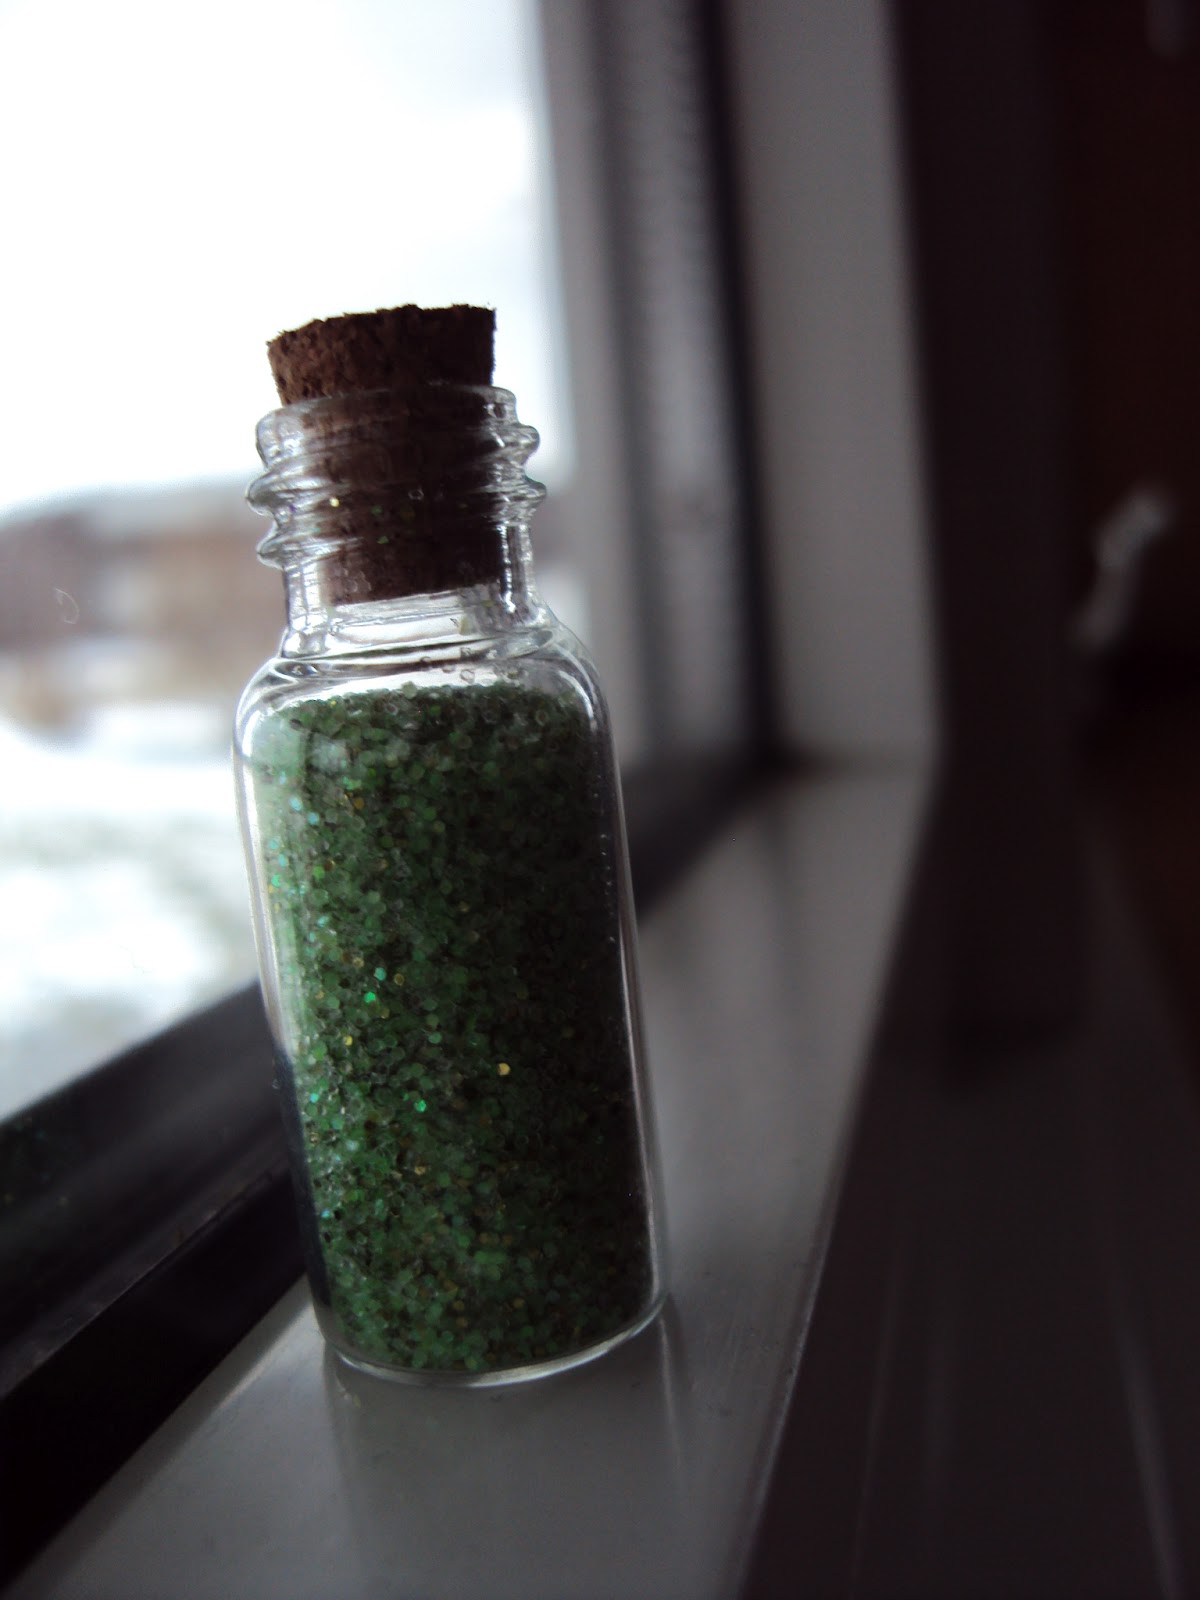
Floo Powder, Remembralls, and the Golden Egg
These are the simple crafts of the party. They each took maybe 5 minutes. Here are a few quick tutorials for Floo Powder (which guests can take home), Remembralls (for decoration), and the Golden Egg from the Triwizard Tournament (useful for activities).
FLOO POWDER

Items Needed:
Green Sparkles (I used two colours; a light green and a darker one and mixed them)
Small bottles, preferably with corks (available at a dollar store. I found a pack of about 10 tiny corked bottles containing beads. I simply emptied the beads into bags and used the bottles. It cost about $1.50)
OR
You could also dye sugar green should you want to make your Floo Powder edible or do not have any green sparkles available
*Later Edit*
I've also found a recipe at planetpals.com to make salt sparkle like glitter. It might not taste as good, but if you'd like to try it, here's the recipe:
Items Needed:
Baking pan
Tin foil
1/4 cup of salt
1/2 teaspoon LIQUID food colouring
Directions:
Mix the salt and food colouring in a small bowl until the salt is uniformly coloured. Spread the mixture out in an even layer on a foil-lined baking sheet. Bake in the oven for 10 minutes at 350 degrees Fahrenheit. Allow your homemade glitter to cool before using it. Can be stored in an airtight container for several months.
Directions:
Quite simply, mix together your sparkles (if applicable) or dye your sugar green, and put it into the bottles. Print off the picture provided below and resize it to fit your bottles, then glue it on. And voilà! A cute little bottle of Floo Powder to give to your guests!

FLOO POWDER
Items Needed:
Green Sparkles (I used two colours; a light green and a darker one and mixed them)
Small bottles, preferably with corks (available at a dollar store. I found a pack of about 10 tiny corked bottles containing beads. I simply emptied the beads into bags and used the bottles. It cost about $1.50)
OR
You could also dye sugar green should you want to make your Floo Powder edible or do not have any green sparkles available
*Later Edit*
I've also found a recipe at planetpals.com to make salt sparkle like glitter. It might not taste as good, but if you'd like to try it, here's the recipe:
Items Needed:
Baking pan
Tin foil
1/4 cup of salt
1/2 teaspoon LIQUID food colouring
Directions:
Mix the salt and food colouring in a small bowl until the salt is uniformly coloured. Spread the mixture out in an even layer on a foil-lined baking sheet. Bake in the oven for 10 minutes at 350 degrees Fahrenheit. Allow your homemade glitter to cool before using it. Can be stored in an airtight container for several months.
Directions:
Quite simply, mix together your sparkles (if applicable) or dye your sugar green, and put it into the bottles. Print off the picture provided below and resize it to fit your bottles, then glue it on. And voilà! A cute little bottle of Floo Powder to give to your guests!

Click "See More" to see the quick tutorials for Remembralls and the Golden Eggs
February 03, 2012
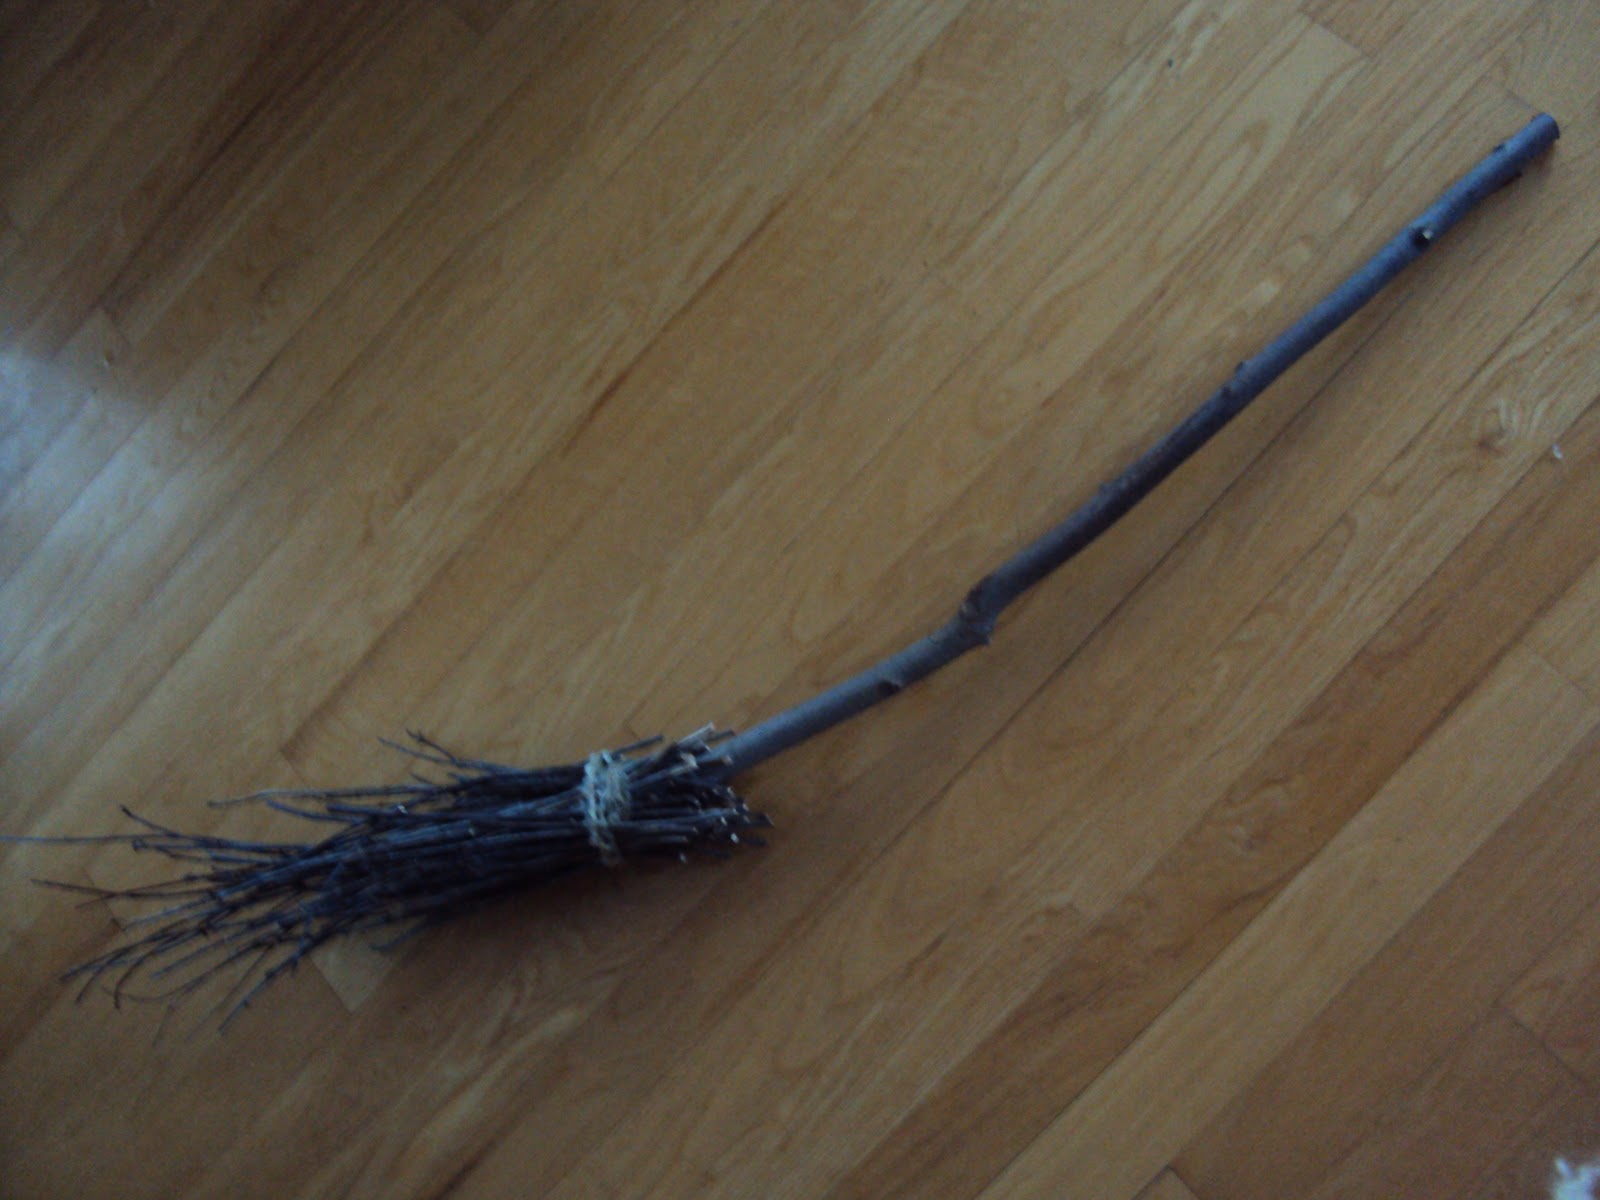
How to Make Your Own Broomstick
A tutorial for how to make your own Quidditch-worthy broomstick! This one was our own version of Harry Potter's "Nimbus 2000".


Things You Need:
Hot glue (A LOT of hot glue)
Twine/String etc.
Sticks/twigs (We honestly went out and trimmed some off of fallen branches. You need a fair few sticks, but it shouldn't take you very long if you go tramping through a forest with a pair of clippers)
A long broom-thickness stick, preferably fairly straight
Directions:
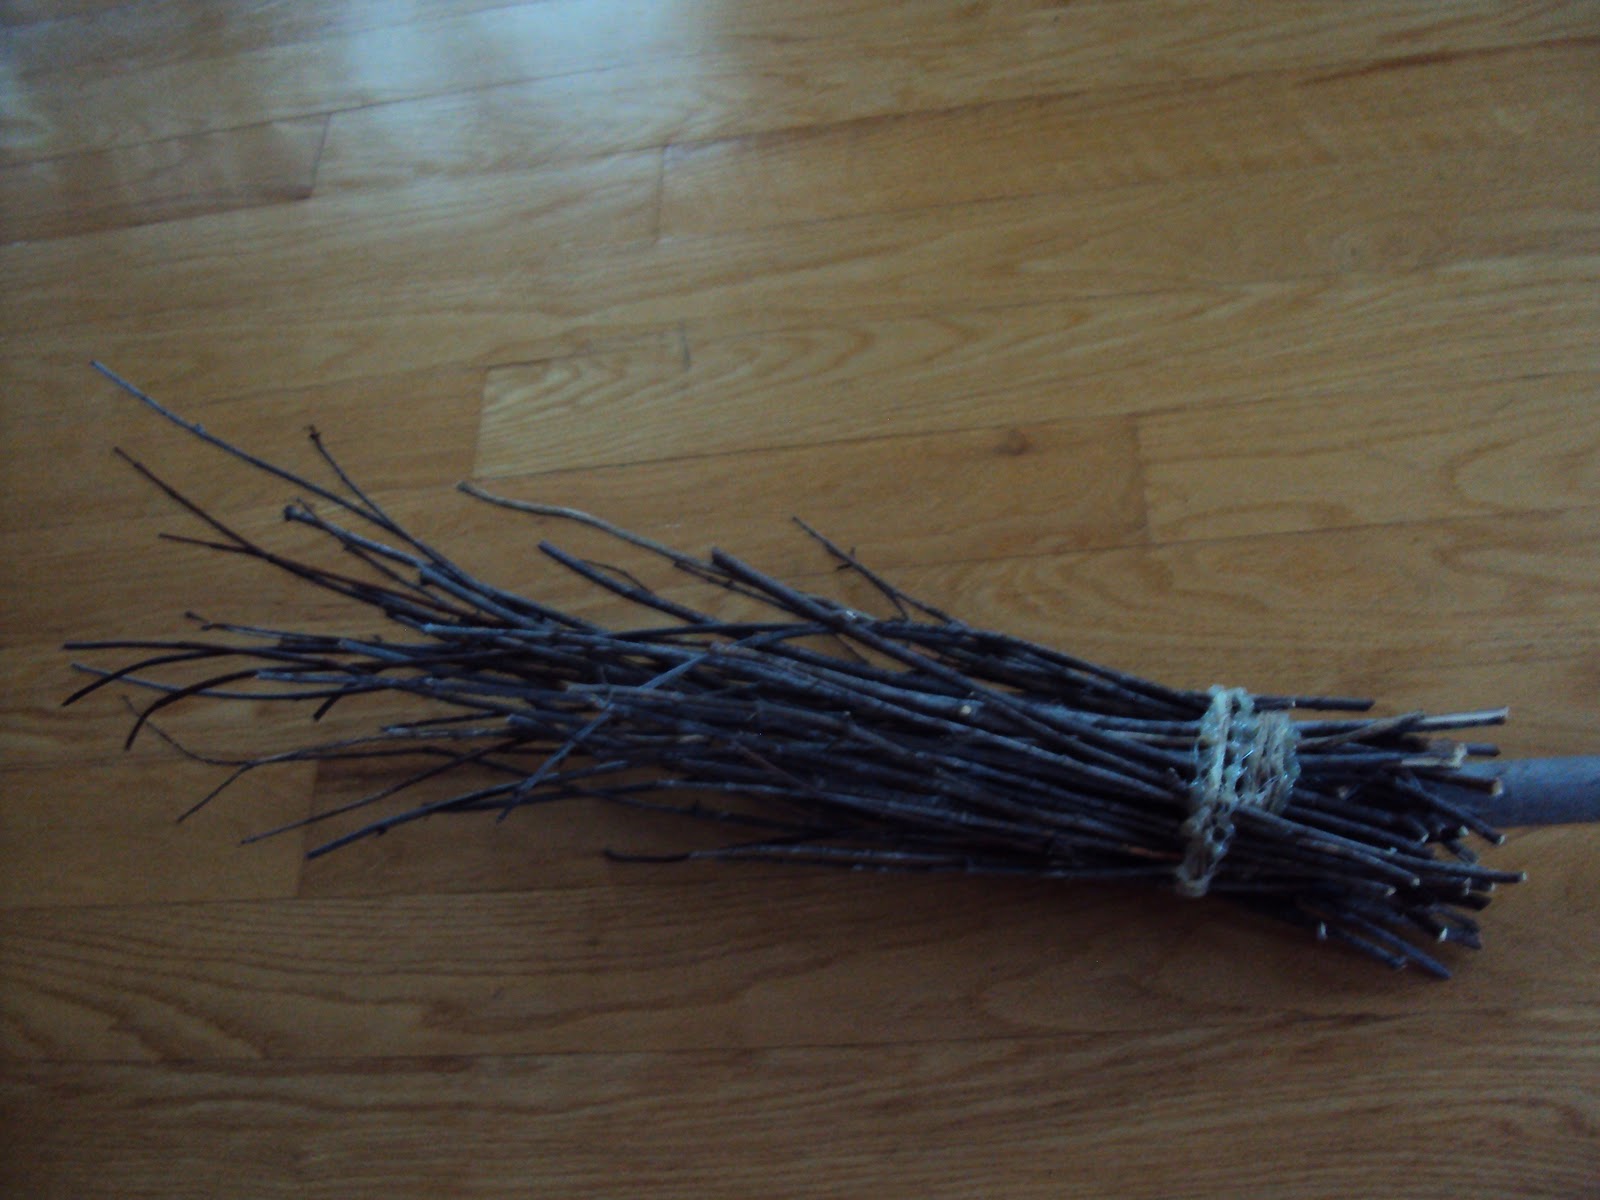
- Sort our your twigs, the ones that will eventually be the tail of your broomstick, into piles depending on length. One pile should be for the short twigs, one for the long ones, and one for the medium twigs
- Take the long twigs and wrap them evenly around the bottom of your broomstick, approximately 6 inches (16cm) from the end of the broom handle while leaving about an inch (3cm) of the twigs on the other side of the twine. You may need someone to help you with this because otherwise the next step will get quite tricky...
- Tie the sticks firmly to the broom by wrapping the twine around and tying it in knots multiple times.
- Adjust the positions of the sticks so that they are evenly spaced around the bottom of the broom. Dribble hot glue in the spaces and around the twine to secure it firmly. It was useful to have one person rotating the broom while the other person applied the hot glue. You may have to go around a few times: once around the top of the twine, once around the bottom of the twine, and once to ensure the gaps were filled (this is why you need a lot of hot glue).
- Follow steps 3 & 4 with the medium sticks and then the short sticks, allowing the glue to dry in between.
- When all of your sticks are glued on and it looks like a broomstick, take some small pieces of twine and wrap it around your broomstick end every 2 1/2 inches (7cm) or so down, tying it tightly enough to shape your twigs into the desired 'broomstick' shape (i.e. the twigs are not sticking out all over the place)
- Leave your broomstick for about a day or two (or longer, it won't hurt) so that the twigs stay in that shape. When you are ready to take the twine on the end off, trim any twigs that still haven't achieved the broomstick shape.
- Take some remaining twine and use it to cover up the hot glued twine and twig section. You can also do a second wrap around the twigs lower down, however, we did not do this
There you go, your own home-made broomstick! If you want to go the extra step farther and you happen to have an engraver, you could also engrave the words "Nimbus 2000" onto it like we did. It made for a neat effect, and you could even fill it in with gold paint!

February 01, 2012
Chocolate Frogs - How to make Chocolate Frogs When You Don't Have a Mould
Another lovely sweet for your Harry Potter Party!
I made this "recipe" up, seeing as I really wanted to give my friends chocolate frogs yet I did not own a candy frog mould nor did I know anyone who possessed one. It's ridiculously easy and will take you less than twenty minutes, less if you've already got the icing made.
Of course, there are plenty of other ways to make these, including a bit more home-made ones such as actually making the chocolates yourself, however, this is a very easy way to do it :) I was also lucky because the Turtles that I used came on sale during the holiday season so I got them for a fairly decent price :). Here's a link to a recipe on About.com that detailed a simple way of making your own version of these treats if you so desire.
Me, however, this was my approach:
'POTION' FROSTING
(The original recipe was titled 'Butter Frosting' and was submitted to the recipe book by Norma Gingerich)
Ingredients:
1/4 cup butter (I had it at room temperature)
2 cups icing sugar
2 egg yolks
1 teaspoon vanilla
1 tablespoon half and half cream (although a richer cream, such as whipping cream, would likely work. This would just make your icing creamier. However, this is just a speculation. If you tried this, please comment with your results.)
Directions:
Beat with an electric mixer until smooth (it really is that easy)
This is also the same recipe that I used to fill the Cauldron Cakes, you can find the post by following that link. This was sort of our generic icing recipe, I also used it to coat the edible snitches.
PUTTING TOGETHER THE CHOCOLATE FROGS:
Things You'll Need:
Chocolate Turtles, (if you wish to see some you can view official Nestlé site here, but you'll need to buy them at a store)
Icing, whether from the above recipe or your own
Small edible sprinkles (or any other nonpareil you happen to have that would work for the purposes. Even a bit of coloured sugar maybe)
Wax paper
Wax paper
Directions:
- Make your icing green by adding a little green food colouring. Next, if you have any clear plastic milk bags (clean ones) they would be perfect for this, but if not simply take some parchment paper and roll it into a cone, securing it by stapling it. Snip off the end of the parchment paper or the milk bag, whichever one you're using, and spoon the icing into it. This is so that we can use it like an icing tip and put little froggy feet onto our chocolate frogs :)
- Put your chocolate turtles onto the wax paper and pipe out little feet for them. Try not to make the toes too long, or the icing will break when you try to take it off the paper.
- Pipe small blobs onto the top as the 'eyes'.
- Take a small nonpareil or sprinkle etc. and pop it into the middle of the eye as the eyeball. If you do not have any substitute that you can use to do this you can just use a toothpick to poke out a small hole in the icing as an eye.
Voilà! They're super cute :) Everybody loved them!
 |
| This guy got a wee bit mutilated from his one eye and a couple of his feet, but overall you get the idea, they were so cute! P.s. our Marauder's Map is in the corner - tutorial on that later! |
January 27, 2012
Chocolate Frogs Box Template
In Harry Potter, there are some lovely sweets called Chocolate Frogs. They come in boxes that each have a collectable card in them.
This template was altered from the one I found at Chica and Jo.com, which was a very useful site.
However, the main alterations I made were:
LINKS TO THE OTHER PRE-MADE CHOCOLATE FROG CARDS:
(They are in alphabetical order)
Bertie Bott Chocolate Frog
Harry Potter Chocolate Frog
Hermione Granger Chocolate Frog
Merlin Chocolate Frog
Morgan le Fay Chocolate Frog
Neville Longbottom Chocolate Frog
Ron Weasley Chocolate Frog
Severus Snape Chocolate Frog
Voldemort Chocolate Frog
THE ALTERABLE PHOTOSHOP FILE:
Chocolate Frog Photoshop Template
Putting the boxes together is pretty straightforward: fold all of the tabs and glue the ones on the bottom of the card together to make the sides of the bottom, and glue the tab on the top so that it stand up like 3D. You don't need to glue the tabs on the top of the template to the bottom of it; they are simply there to hold the lid down.
Another important note is that we printed these templates on card stock again. Card stock is just a heavier type of paper that is sturdier than regular printer paper. It was very useful for making the Chocolate Frog boxes stiffer.
>>Link to Table of Contents
This template was altered from the one I found at Chica and Jo.com, which was a very useful site.
However, the main alterations I made were:
- I made the purplish colour into a deep blue, because that was more how I had always imagined the boxes in the Harry Potter movies
- I made the bronze colour into more of a gold for the same reasons as the above point
- I got rid of the colour in most of the tabs to save on ink
- I put text on the bottom of the boxes so that I wouldn't have to go through the trouble of lining up my printer to print on the backs of each of the wizard cards
- I made my own wizard cards to put inside of the boxes, which I placed conveniently right next to the box on the same page to minimize paper waste
I hope you find that these alterations suit your desires for a chocolate frog box. I made ten individual chocolate frog cards and descriptions, one for everyone at the party. I've uploaded my Albus Dumbledore one here and provided links to the other ones below the picture, which are up on my MediaFire account so that this post does not get cluttered.
 |
| This is the Albus Dumbledore Chocolate Frog Card and template. The description is taken directly from the book. |
(They are in alphabetical order)
Bertie Bott Chocolate Frog
Harry Potter Chocolate Frog
Hermione Granger Chocolate Frog
Merlin Chocolate Frog
Morgan le Fay Chocolate Frog
Neville Longbottom Chocolate Frog
Ron Weasley Chocolate Frog
Severus Snape Chocolate Frog
Voldemort Chocolate Frog
THE ALTERABLE PHOTOSHOP FILE:
Chocolate Frog Photoshop Template
Putting the boxes together is pretty straightforward: fold all of the tabs and glue the ones on the bottom of the card together to make the sides of the bottom, and glue the tab on the top so that it stand up like 3D. You don't need to glue the tabs on the top of the template to the bottom of it; they are simply there to hold the lid down.
Another important note is that we printed these templates on card stock again. Card stock is just a heavier type of paper that is sturdier than regular printer paper. It was very useful for making the Chocolate Frog boxes stiffer.
>>Link to Table of Contents
January 26, 2012
Bertie Bott's Every Flavour Beans Box Template
Here is a printable template of the Bertie Bott's Every Flavour Beans box for your use!
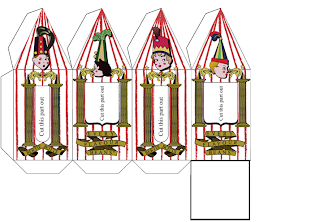 I did initially find this template on DeviantArt by 61098 (unfortunately they have since deactivated their account), however, after printing one of them out and cutting everything, I realized that there really wasn't any way to attach the triangles at the top together, nor was there an actual bottom for the boxes. So I popped it into Photoshop and gave it those essentials and voilà! The Bertie Bott's Every Flavour Beans template!

You are free to print this out and use it. What we did to put them together was:
 To put the beans in them we wrapped the beans up in plastic wrap by putting the beans in the centre and then twisting all of the corners together. The corners went on the bottom of the box.


You are free to print this out and use it. What we did to put them together was:
- Print the template out. There are two ways to do this: You can print the template on card stock paper OR you can print it on regular paper and cut out cardboard from cracker boxes, cereal boxes etc. to paste under it to give it a bit more strength. We chose to cut out cardboard as well so we wouldn't waste so much card stock.
- Cut out the template, including the windows.
- If you printed on card stock, you've got it easy. All you need to do is glue everything together EXCEPT for the bottom, because that's where you'll be inserting the beans when you're ready to 'serve' them. However, if you printed on regular paper, to make it more durable find an empty cardboard box such as those used for crackers, cereal, cake mixes etc. Trace your template onto it and cut that out. You do not need to cut the tabs out of cardboard on the bottom and sides of the template, but you DO need to cut out the bottom.
- Glue the paper template to the cardboard template. We did it so that the blank grey/brown side was on the INSIDE, because the patterns on the outside didn't show through the paper.
- Glue all the tabs together to make it into a box EXCEPT for the bottom (because you need it to put the beans in).
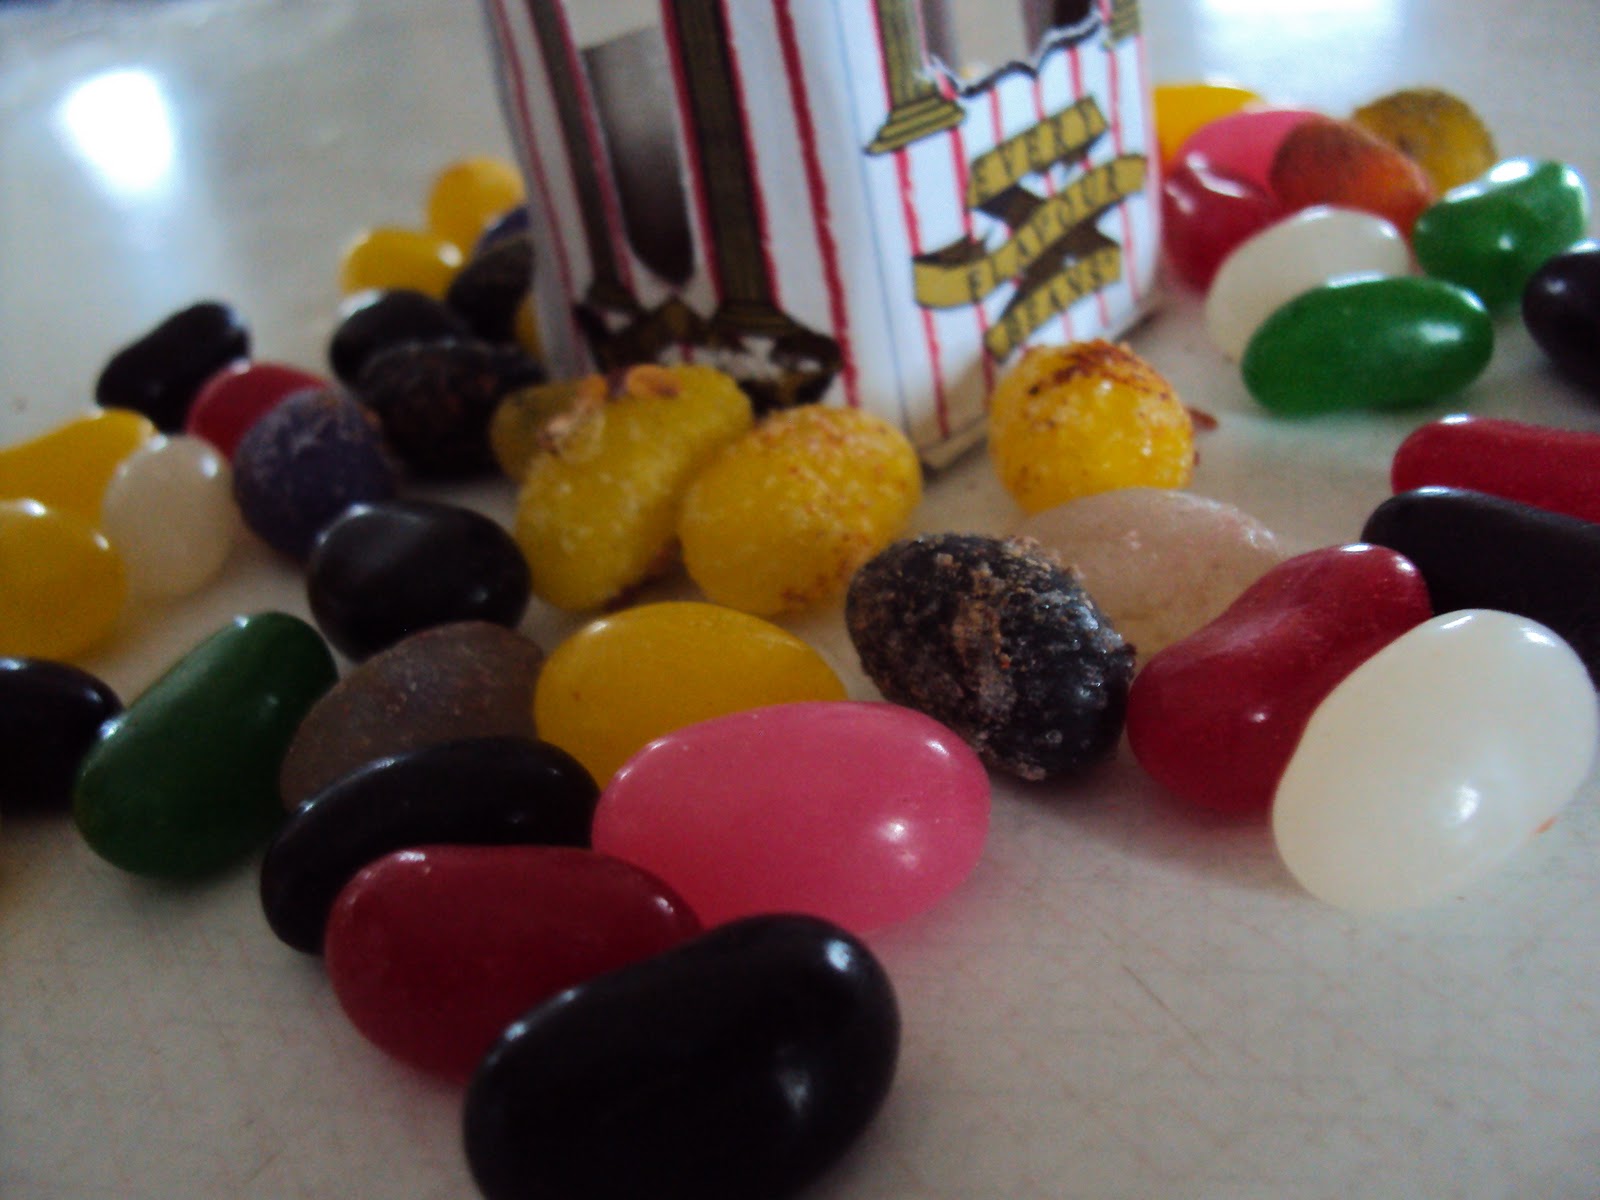
Congratulations, you have officially made a Harry-Potter worthy Bertie Bott's Every Flavour Beans box. Here's some pictures of how ours turned out:


Bertie Bott's Every Flavour Beans Recipe
Hello again!
Here's another lovely recipe for you Potterheads: Bertie Bott's Every Flavour Beans!

What do you do when you can't find the brand-name every flavour beans? If you can't find a box of the Bertie Bott's anywhere at all? Why, you make your own, of course!
If you would also like to make a box for your Bertie Bott's Beans, a link to the tutorial and templates for the Bertie Bott's Boxes can be found here: Bertie Bott's Every Flavour Beans Box Template
This recipe is fairly simple and hardly costs anything. However, I would really recommend making these only a day or two at most ahead of time because you really don't want them to spoil with all of the interesting flavours you're stacking on them.

Things You Need:
A package of jelly beans, be they Jelly Bellies, No Name, or any other sort
Some spices or other interesting items to make your beans truly "every flavour"
Directions:
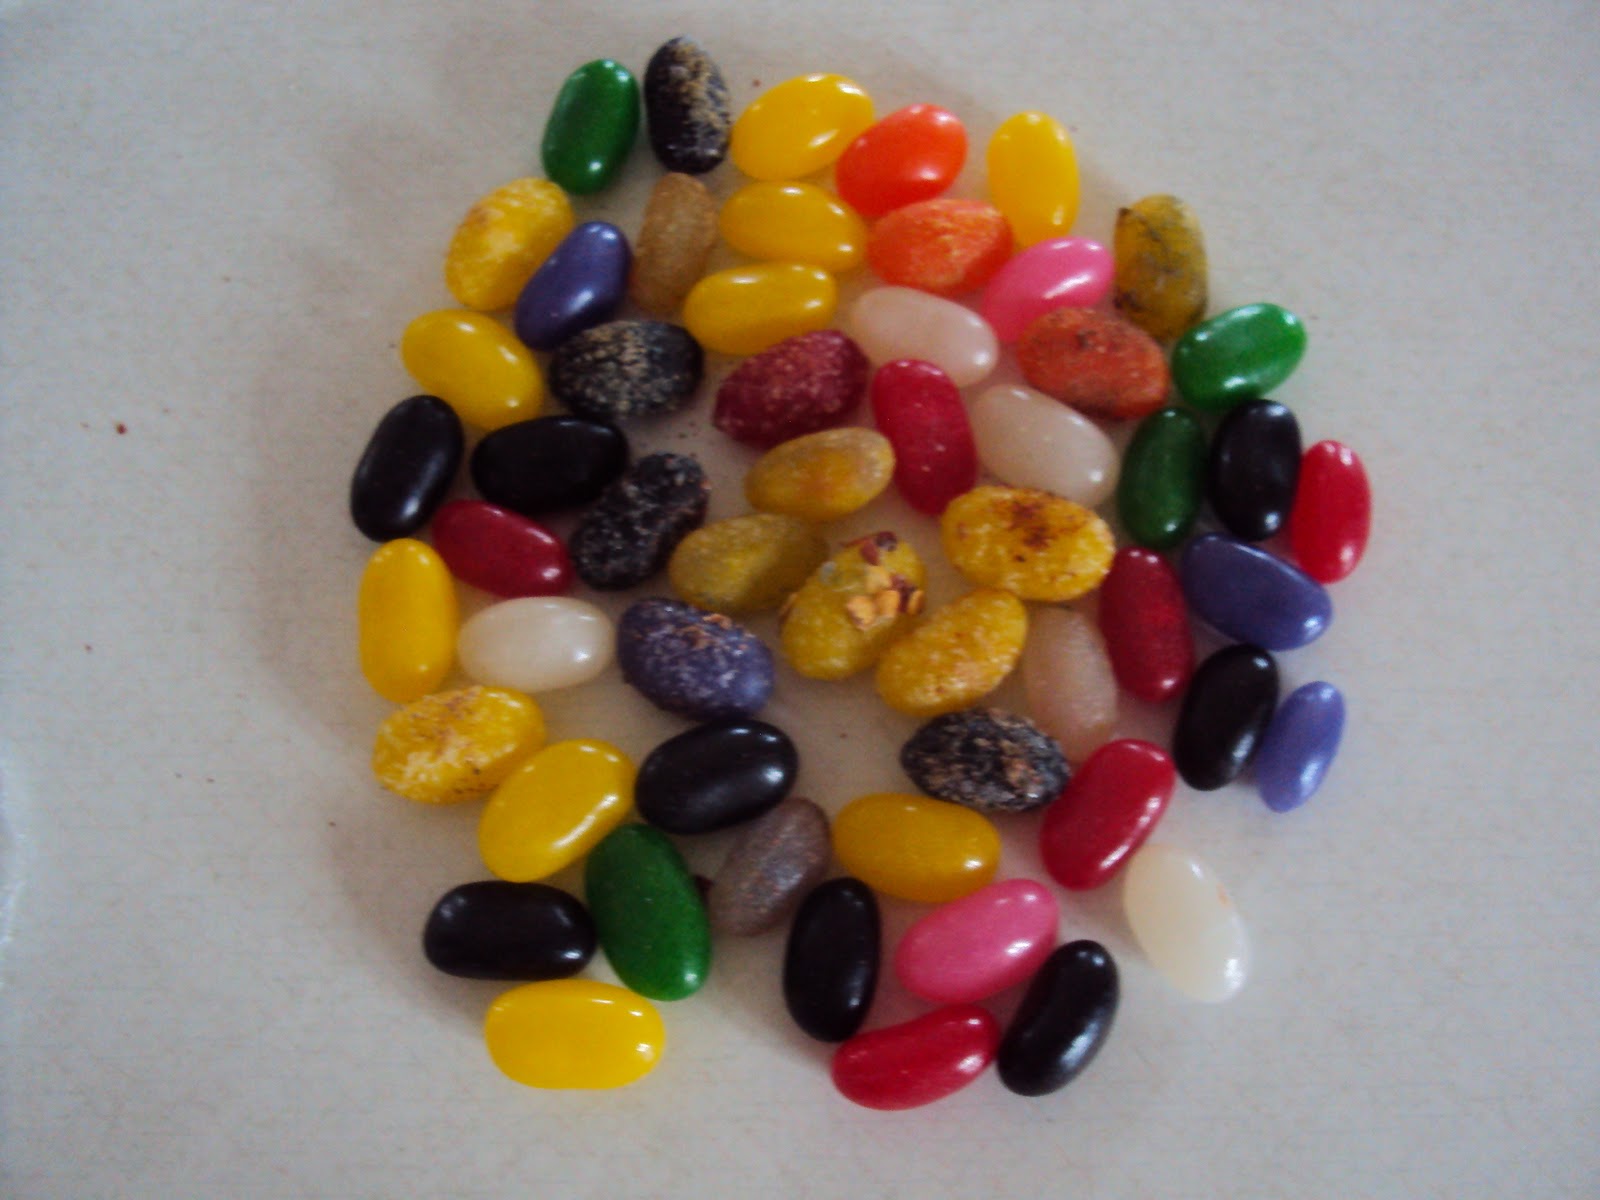
You can pick and choose which sorts of flavours you would like to try. However, the main thing that I should tell you is that the black jelly beans do not absorb a lot of flavour; they still taste like black liquorice.
FOR SPICY BEANS:
You need: Spices, Sugar, and Newspaper


Here's another lovely recipe for you Potterheads: Bertie Bott's Every Flavour Beans!

What do you do when you can't find the brand-name every flavour beans? If you can't find a box of the Bertie Bott's anywhere at all? Why, you make your own, of course!
If you would also like to make a box for your Bertie Bott's Beans, a link to the tutorial and templates for the Bertie Bott's Boxes can be found here: Bertie Bott's Every Flavour Beans Box Template
This recipe is fairly simple and hardly costs anything. However, I would really recommend making these only a day or two at most ahead of time because you really don't want them to spoil with all of the interesting flavours you're stacking on them.
Things You Need:
A package of jelly beans, be they Jelly Bellies, No Name, or any other sort
Some spices or other interesting items to make your beans truly "every flavour"
Directions:
You can pick and choose which sorts of flavours you would like to try. However, the main thing that I should tell you is that the black jelly beans do not absorb a lot of flavour; they still taste like black liquorice.
FOR SPICY BEANS:
You need: Spices, Sugar, and Newspaper
- Mix up some sugar water, which is just granulated sugar (or icing/confectioner's sugar if you like) with water. You won't need too much, we used about 1/2 water to 1/2 sugar, but you may have to adjust this so that you get a fairly thick mixture that will coat your beans so that the spices stick to them
- Lay out some newspaper on your counter, possibly with some paper towels underneath them or have a LOT of newspaper, as this does get a little messy (but not a lot; the beans will just be wet from the sugar water)
- Get out your spices and sprinkle a decent pile onto a small patch of the newspaper. Some of the spices that we used included: Ginger, Cinnamon, Chilli Powder, Ground Hot Pepper, Nutmeg, and Paprika. The ground hot pepper was a major hit, it was dried hot pepper and it punched a really unexpected pack of hotness!
- Dip one of the jelly beans into the sugar water and then roll it gently in the spice of choice. Let it sit on the newspaper to dry.
- Continue this pattern for all of the beans you wish to flavour! It will take some time, but they turn out so well.
Notes on the flavours: The ginger ones were pretty gross but still amusing to accidentally eat, the cinnamon ones were very tasty, the chilli powder ones tasted rather peppery, the ground hot pepper ones were fabulous, as mentioned above in step 3, and the nutmeg and paprika tasted funny but not awful.
You could also experiment with spices such as mint, dill, or garlic powder to add some more variety :)

FOR VINEGAR BEANS:
You need: Vinegar, an old bowl (or one you don't mind if it's stained), and newspaper
- Put the beans you wish to flavour into a bowl. I would possibly recommend having small bowls for each of the colours of beans OR doing each colour separately because the colours (especially the black) tended to wash off a bit and stain the other beans
- Cover the beans with vinegar and let them soak for a while. I think that we soaked ours for 2 or 3 hours, but I would recommend 5 or 6 so that they really get the flavour because the only real difference I noticed in ours was that much of their colour had washed off
- When the beans are done soaking, put them onto the newspaper to dry.
These ones were okay, they didn't taste much different than the regular beans. They simply looked interesting.
OTHER IDEAS:
We didn't do more than that, but if you wanted to get creative you could try dipping some in honey or corn syrup. You might even try soaking them in different liquids such as apple juice to experiment with achieving different flavours. I found that we got the best results from rolling the beans in various spices, however, as opposed to soaking them in vinegar.
January 22, 2012
Cauldron Cakes

Here is a recipe for some truly delicious Cauldron Cakes from the Harry Potter universe. No one really knows what Cauldron Cakes are, but most people have gone with a sort of dark chocolate cupcake with a filling inside. (Here's a printer-friendly version of the recipe in PDF format on MediaFire.com) Here's the recipe that I came up with, used from an old cookbook:
CAULDRON CAKES
(The original recipe was titled 'Deep Dark Chocolate Cake' and was submitted to the recipe book by Ruth Schnurr)
Ingredients:
1 3/4 cup all-purpose flour
2 cups sugar
3/4 cup cocoa
1 1/2 teaspoon baking soda
1 1/2 teaspoon baking powder
1 teaspoon salt
2 eggs
1 cup milk
1/2 cup vegetable oil
2 teaspoons vanilla
1 cup boiling water
Directions:
- Combine the dry ingredients in a large mixing bowl. Add the remaining ingredients except for the boiling water, beat at medium speed for 2 minutes.
- Stir in boiling water (batter will be thin) (Note from FlightlessPhoenix: And Merlin was the batter thin, I thought I had done something wrong, but they turned out absolutely gorgeous and yummy)
- Fill greased muffin tins about 1/2 to 2/3 full. Don't use paper muffin cups. The Cauldron Cakes get their shape from the round tin.
- Bake at 350°F for 15-20 minutes or until you can insert a toothpick into the centre of a cupcake and it comes out clean.
- Remove from oven and cool for 10 minutes on a wire rack (Note from FlightlessPhoenix: if you're unfamiliar with this term like I was (I once ruined a cake trying to do this), 'cooling on a wire rack' or 'remove and put onto a wire rack' in cooking instructions usually does NOT mean take it out of the pan and put it onto a wire rack. Most times it just means to put the entire pan with the cake/cupcakes/brownies etc. in it onto the wire rack. This is to get the air flowing underneath the pan to cool the food in the pan down faster and prevent the bottom from burning. If you don't have any wire racks you can skip putting them on that, but I would recommend it if you do since it's rather painless)
- After about 10 minutes of cooling carefully remove the cupcakes from the pans and cool completely.
IMPORTANT NOTE: If you would like to use this recipe to make a cake (and who knows, it'd be a pretty cool idea to make a ginormous Cauldron Cake!), follow Steps 1 and 2, and then follow these steps instead:
3. Pour into greased and floured 9" or three 8" layer pans or 1 - 9" x 13" pan.
4. Bake at 350°F for 30 to 35 minutes for layers, 35 to 40 minutes for 9" x 13" pan, or until cake tester comes out clean (Note from FlightlessPhoenix: 'cake tester' is just a toothpick inserted into the centre doesn't come out with cake crumbs or gooey batter).
5. Remove from oven and cool for 10 minutes on a wire rack (Note from FlightlessPhoenix: read the long note in italics if you're confused as to the meaning of that sentence.)
6. After 10 minutes of cooling, remove from pan(s) and cool completely. Top with your favourite frosting or try to mimic the technique used for the Cauldron Cakes if you like.
Now we're going to make the cupcakes look like actual 'Cauldrons'. You can make the icing first or follow the next steps to hollow out the insides.
MAKING THEM INTO CAULDRON CAKES:
Depending on how much batter you put into each muffin tin, you may or may not have rounded tops. It doesn't matter if you do or don't; if you do, however, you have the choice of slicing them off so that the tops are flat or keeping them the way they are. I'll let you read the next few steps so that you know if you want to cut the tops off or not.
- Using a small spoon, turn the cupcakes upside-down and hollow out a small hole in the centre. This is the 'cauldron', where the 'potion' will go. Tip: If the bottom of your cupcake turned out ugly, it's fine to use the top, however, using the bottom gives it a nicer 'cauldron' shape
- You can put the hollowed out cupcake bits to the side to be used later (perhaps in a pudding or something, or you might just eat it ;). Now we'll make the icing to put inside of the cupcakes:
'POTION' FROSTING
(The original recipe was titled 'Butter Frosting' and was submitted to the recipe book by Norma Gingerich)
Ingredients:
1/4 cup butter (I had it at room temperature)
2 cups icing sugar
2 egg yolks
1 teaspoon vanilla
1 tablespoon half and half cream (although a richer cream, such as whipping cream, would likely work. This would just make your icing creamier. However, this is just a speculation. If you tried this, please comment with your results.)
Directions:
Beat with an electric mixer until smooth (it really is that easy)

For your Cauldron Cakes:
Take some of the icing -- I think we used about a quarter of it -- and put it into a bowl, then use some green food colouring to make it green (feel free to experiment with different colours, however, if you wish). Next, if you have any clear plastic milk bags (clean ones) they would be perfect for this, but if not simply take some parchment paper and roll it into a cone, securing it by stapling it. Snip off the end of the parchment paper or the milk bag, whichever one you're using, and spoon the icing into it. This is so that we can use it like an icing tip and fill up the Cauldrons with the icing.
Squirt out as much or as little of the icing as you like into your Cauldron Cakes. We found that it looked neat if you made swirling designs on the top for 'bubbles'.
You also have the choice here of adding other things to the centre of your Cauldron Cakes, such as cotton candy, crushed candy, sprinkles, dry cereal, or any other sort of sweet you have lying around. I had some Almond Nut squares lying around, so we took one of those and crushed it up, then filled the bottom of the Cauldron Cake with those and topped it with the icing. This is so that the Cauldron Cake does not get too sweet with all that icing.
Finally, take some liquorice, black or red, it doesn't matter (I just had some red liquorice, and I know that most people don't like black liquorice even though the colour would suit it better). Depending on the type of liquorice that you have, you can either use a string of liquorice or you can cut the liquorice into the desired length. It is going to be the handle of the Cauldron, so it's up to you how long you'd like it to be.
 |
| One of the unfortunate broken-handled Cauldron Cakes. |
We cut our liquorice in half lengthwise, and then again in half the other way. You can either choose to put the handles on your Cauldron Cakes now or later; however, even though we had made our Cauldron Cakes the night before the party, most of the handles had snapped in half at the top, so I recommend putting the handles on just before serving them.
And ta daa! You're done! Now you have a lovely batch of Cauldron Cakes to serve up to your guests or to save just for home eating.
The Letters/Invitations--Wax Seal Tutorial
There are six parts to this post, although I've split them up for ease of reading. This is the sixth (and last) post.
Table of Contents:
6. Wax Seal tutorial
Now, onto the wax seal tutorial!
Items needed:
-Clay (can be bakeable or not, doesn't matter. I got mine from the dollar store for about a buck and a half)
-Toothpicks, needles, any small sort of device you can use to carve a design in the clay
-A picture of what you'd like your stamp to look like (i.e. the one below)
-A hot glue gun OR wax sticks
-Paint OR wax sticks in the desired colour
-Ice pack
-Oil (like vegetable oil)
-Wax paper (or parchment paper but wax paper is recommended)
-Paper towels (optional but recommended)
-Newspaper (optional but recommended to minimize mess)
 |
| A picture of what to possibly carve on the stamp. |
Curious Goods has a good tutorial that you can see by following the link. We did ours a wee bit differently but the general idea was the same.
Directions:
1. Roll out an oblong piece of clay and flatten the bottom to be about the size you want your stamp to be. The oblong bit will be the handle
2. Take a toothpick or a needle or whatever else and carve your design into the flat clay part. Remember that whatever is carved into the stamp will be raised on the actual seal. You should carve it in fairly deep (see ours for reference, pictured below)
 |
| It's a bit crumbly because this picture was taken after it had stamped a fair few seals. |
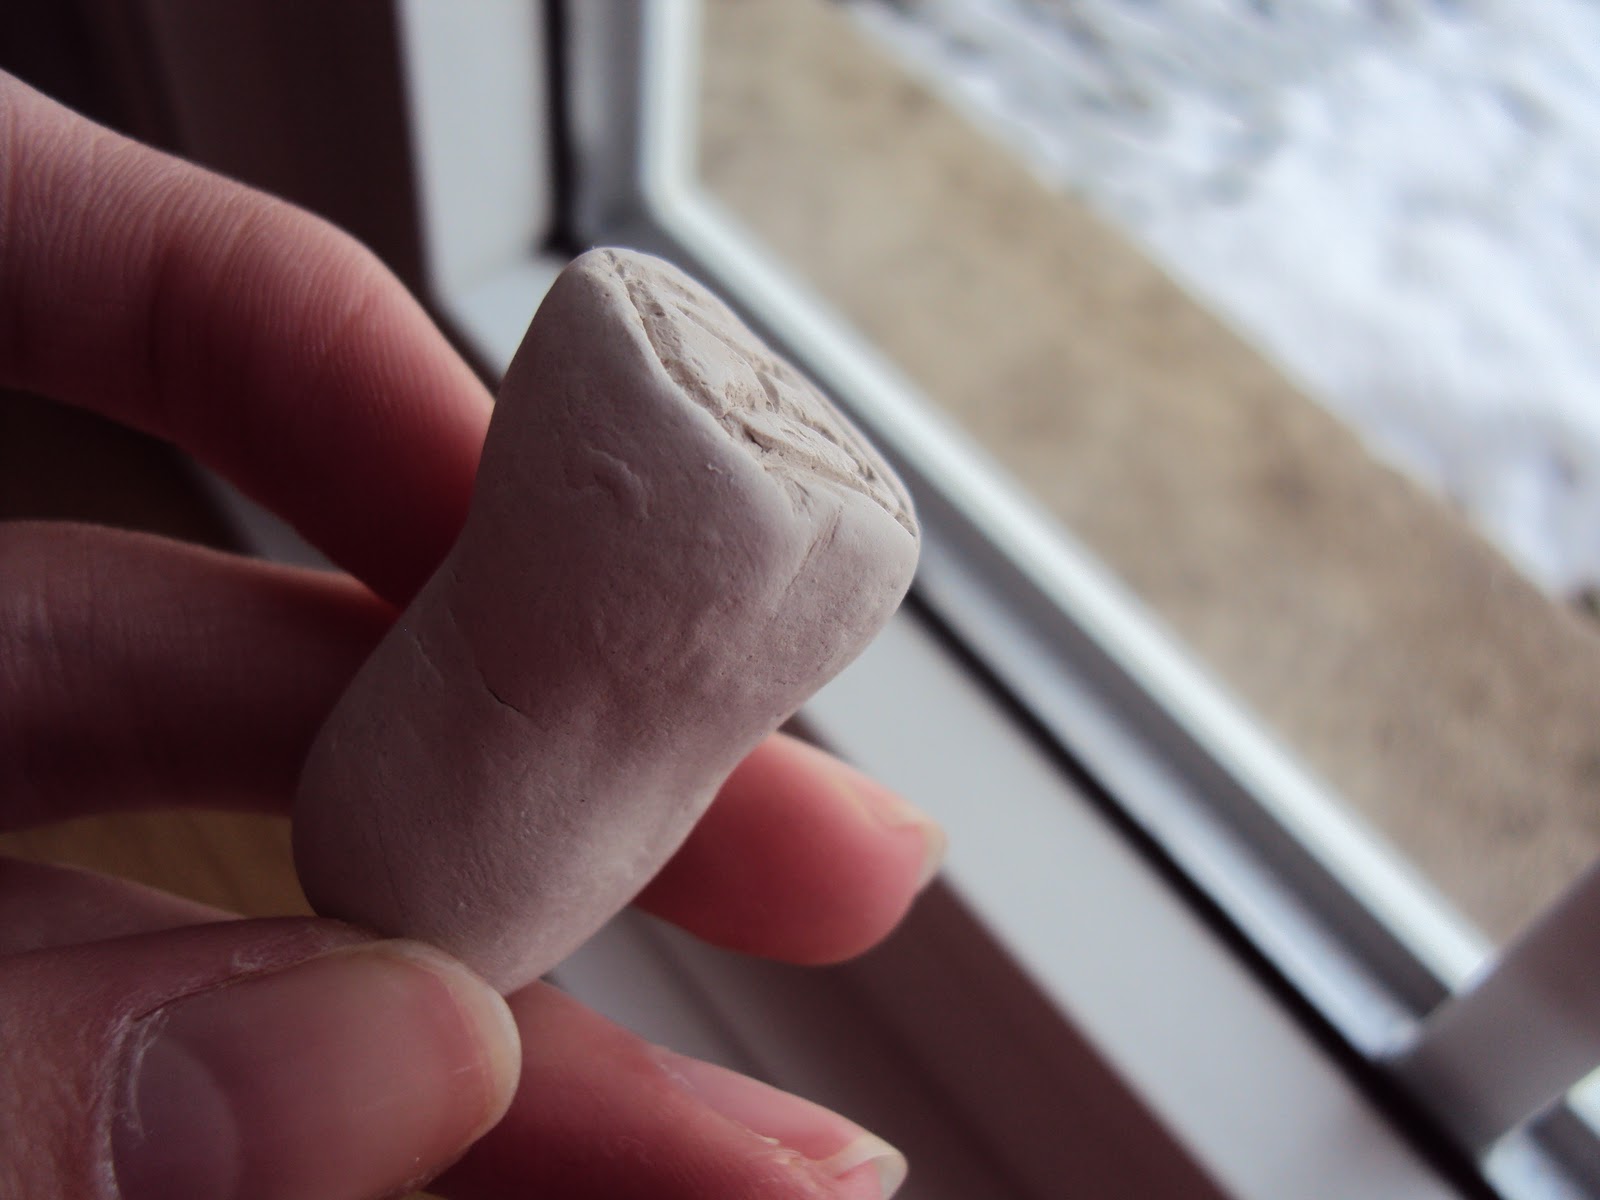 |
| Side view so you can see the 'handle'. |
3. Let your stamp harden or bake it (follow the instructions that came with your clay if you must bake it. Ours we just let dry overnight)
4. When your stamp is dry, heat up your hot glue gun. Cut some wax paper into squares that will fit your stamp onto it and get out your ice packs and vegetable oil. Place your stamp on the ice pack to harden it a bit further before stamping your seals. Put a small amount of vegetable oil into a container that you can easily dip your stamp into.
5. When the glue gun is hot enough, squeeze out a blob of glue onto the wax paper square and let it sit for 30 seconds
6. Dip your stamp into the oil and dab some of it off onto a paper towel, then press it into the blob of glue
7. Move the wax paper, glue and the stamp onto the ice pack
8. Remove the stamp by wiggling it when the glue starts to cloud up. Keep the glue seal on the ice pack to harden and cool.
9. Repeat for as many seals as you like.
10.Wash off the seals with soap and water when they are completely hardened to get the oil off.
11.Paint the seals (or spray paint, it doesn't really make a difference). In the movies the seal is red, but in the book it is described as purple (which makes more sense because it wouldn't single out any one house). I achieved a purple colour by blending a royal blue with red together and then mixing a wee tiny bit of black in. I also used food colouring to help me with the red shade (although if you have better options to colour it that would likely be preferable).
12.Glue them to the outside of your stained envelope with a small dot of white or hot glue
Our guests were totally thrilled with the invitations and the 'wax' seals were a big hit. Here's a closeup of our finished seals:
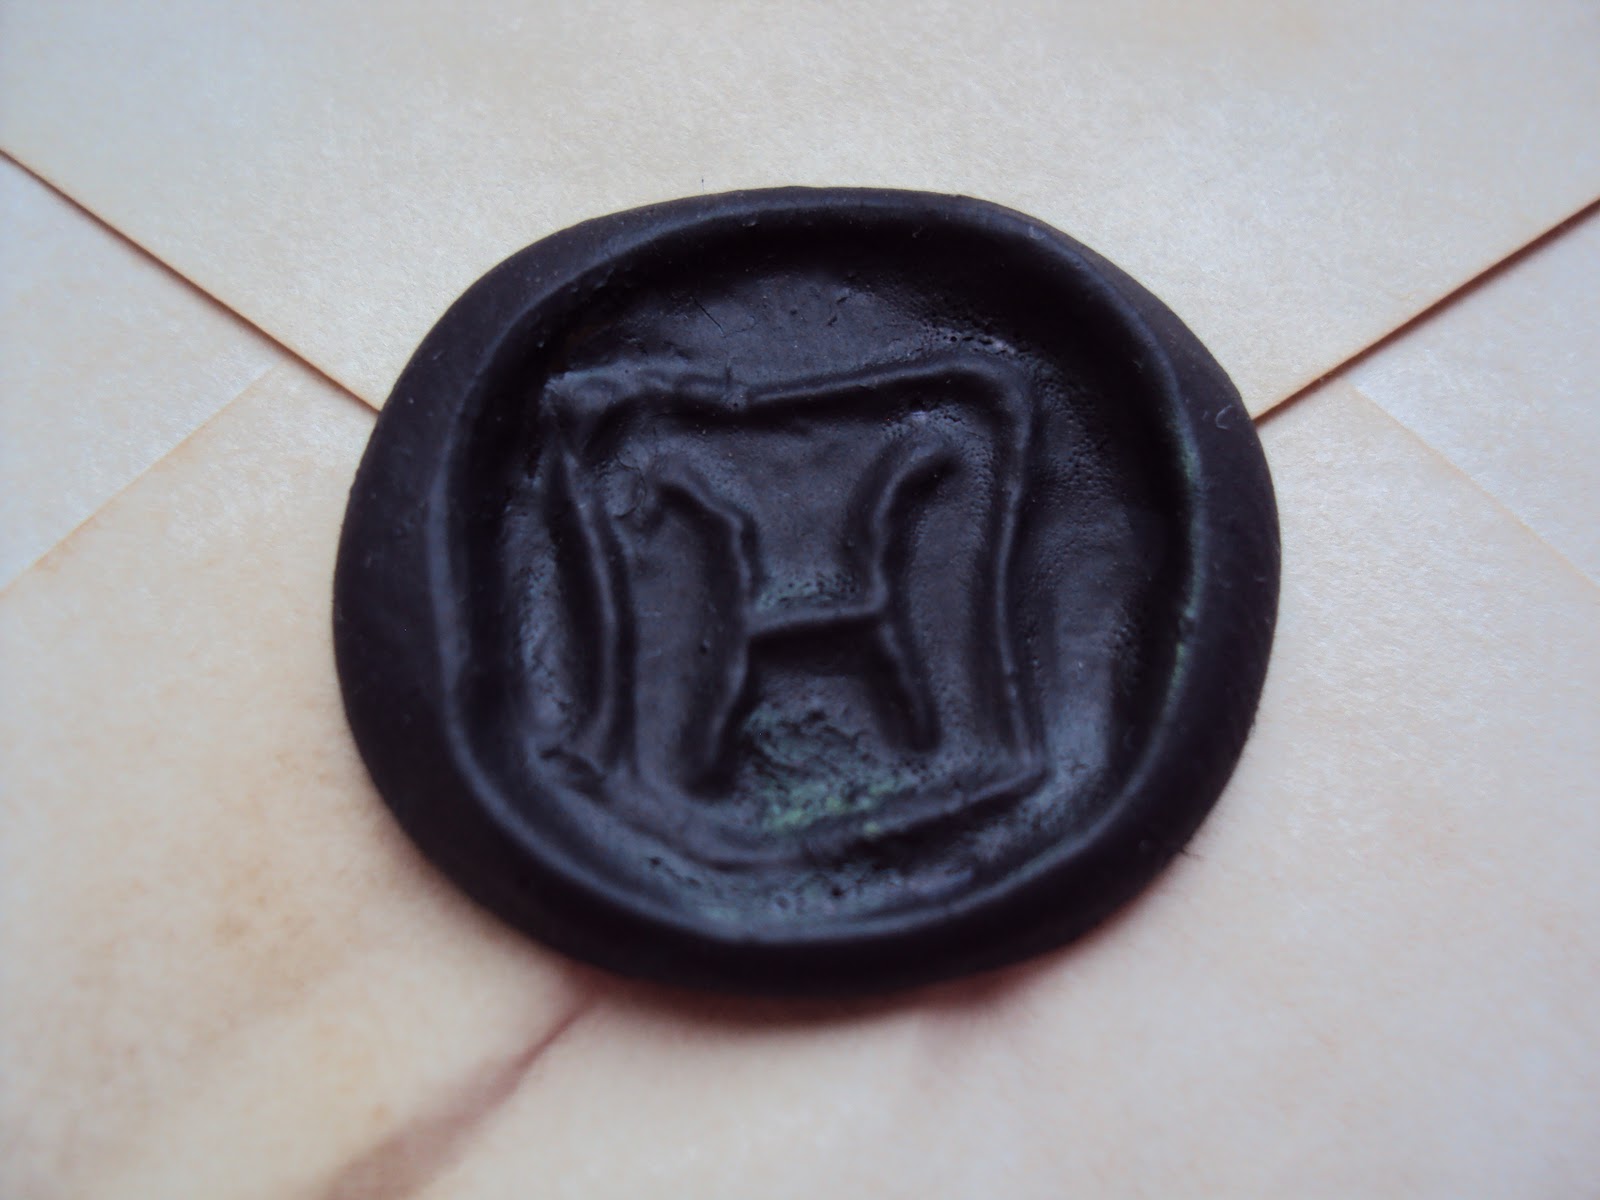
And here it is sitting on the letter:

The Letters/Invitations--How to Stain Your Paper tutorial
There are six parts to this post, although I've split them up for ease of reading. This is the fifth post.
Table of Contents:
5. How to stain your paper
TUTORIAL FOR STAINING THE PAPER:
Items needed:
-Paper (NOTE: You should have already printed on the paper, as it is very unwise to print on the paper after it has been coloured. If you have an ink printer the ink will likely run. It is recommended that you use a laserjet printer for this activity)
-Tea (the kind does not matter but a brown or orange tea is preferable because this is the colour your paper will turn)
-Instant Coffee (optional, but adds a cool effect)
-Cookie trays/jelly roll pans (15"x1"x10" pan. Although any oven-safe pan that fits a piece of paper onto it should be fine)
-Newspaper or rags to put the paper on afterwards to dry
-Heavy flat objects to put on the paper afterwards to flatten it
Directions:
- Make a pot of tea. After it is done brewing I prefer putting it into bowls because you'll be scooping it on and off of the cookie trays.
- Heat your oven to 200 degrees Fahrenheit. While it is warming up put the paper on the cookie sheet and spoon the tea over it. The tea can be hot or cold, but it stains better warm (I'm telling this so you know that you can store it in a container if you want and finish staining later or something). Try to cover the whole paper with tea.
- Crush some of the instant coffee and sprinkle it over the paper. Allow it to clump in some areas -- this stains the paper darker in that area and makes for a neat effect.
- Let the instant coffee sit on the paper for 1-2 minutes, then flip it over and repeat with the spooning of the tea and the sprinkling of the instant coffee on the other side
- Take the paper off the pan and drain the tea back into the bowl. You might also want to dry the pan with a rag before the next step to prevent stains (recommended to use an older cookie tray for that reason)
- Put the paper printed (ink) side up back onto the cookie tray and bake it in the oven for 5-8 minutes (depending on how long it takes the paper to dry)
- Remove the paper from the oven and put on newspaper with books on top to flatten it out
- Tadaa! Some people might also recommend burning the edges, but we didn't do that. We thought it looked old enough without the burning.
Other mentionable information:
- The tea will gradually get darker with each paper you stain due to the coffee granules, so you might want to replace it now and then
- If you want a darker stain, use brewed coffee instead of the tea
- You don't have to let the coffee granules sit on the paper, but they soak in better if you do (this is if you're strapped for time)
- You can store the tea in a container and use it to stain paper later on
- You might want to have two or three cookie trays of these sheets going at once so that you will always have another piece of paper ready to put in after one finishes baking (we rotated two in and out of the oven, i.e. one was in the oven while we prepared the second one)
You can also stain the envelopes, if you wish. We did the inner envelopes only because I'm sure the people mailing your letters wouldn't be impressed with the stained envelope, should it be on the outside.
Our advice for staining the envelopes is as such:
1. Print on the envelope FIRST, UNLESS you don't have an envelope-compatible printer, in which case you will have to stain the envelope and then write on it by hand
2. Leave the flap of the envelope open so that it does not stick down to the rest of the letter while baking (although it may stick to the pan, which is why it is important to use an older pan! If you soak it in a bit of water it comes off)
3. Put the envelope ink side-up, unless you are writing on it by hand after it has been stained. If the ink has gone on first, however, ink side MUST go up otherwise it may stick to the bottom of the pan and come off.
4. Envelopes take a bit longer to dry in the oven -- probably more like 6-10 minutes
I hope that this helps you!
The Acceptance letters, Equipment letters, and Platform 9 3/4 tickets went inside the stained inner envelopes. We stained the Acceptance letters and the Equipment letters and also many other things, such as the papers that went into the Goblet of Fire and our Marauder's Maps.
>>Link to Table of Contents
>>Link to Table of Contents
Subscribe to:
Posts (Atom)